
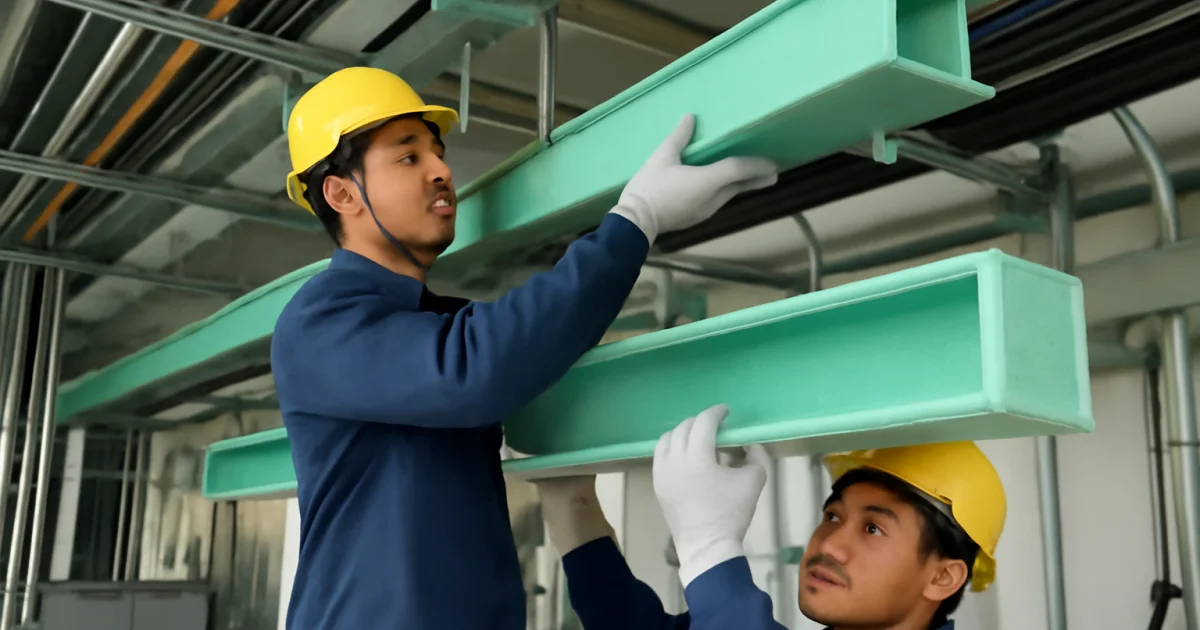
Fiber Reinforced Polymer (FRP) trays have become the industry standard for supporting cables, pipes, and other utilities in demanding environments. Their corrosion resistance, lightweight design, and robust performance make them ideal for industrial, chemical, and manufacturing facilities across Malaysia and beyond. However, achieving the full benefits of FRP trays relies on correct installation. This comprehensive, step-by-step guide will take you through every phase of installing an FRP tray system for maximum durability and efficiency.
Understanding FRP Trays and Their Industrial Benefits
FRP trays are engineered composite structures made from reinforced fiberglass and polymer resins. Unlike conventional metal trays, they resist corrosion, moisture, and chemicals, making them suitable for harsh production floors, chemical plants, wastewater facilities, and marine applications. Key advantages of FRP trays include:
- Corrosion resistance—ideal for chemical and humid environments.
- High strength-to-weight ratio—easy handling and support for heavy cable or pipe loads.
- Electrical insulation—reduces the risk of electrical faults.
- Low maintenance—long service life, even in aggressive settings.
FRP trays are a preferred choice for construction companies, industrial manufacturers, chemical plants, water treatment operators, and property developers seeking reliable, long-lasting infrastructure solutions.
Pre-Installation Planning: Assessing Site Requirements
Proper planning is crucial for a successful FRP tray installation. Begin by assessing your facility’s requirements:
- Identify tray runs: Map the path for cables, pipes, or utilities. Consider access, safety, and equipment locations.
- Load calculation: Estimate the total weight of cables or pipes and select FRP trays with adequate load ratings.
- Environmental factors: Analyze exposure to chemicals, heat, humidity, and UV light to ensure material compatibility.
- Support structure: Plan supports, brackets, and fixings according to building structure and tray span recommendations.
Involving experienced engineers or consulting with FRP specialists like OCM during the planning stage can help avoid costly mistakes and ensure compliance with industrial standards.
Checklist: Questions to Address Before Installation
- Are there existing obstacles or utilities that may interfere with tray runs?
- Is the facility prone to flooding, excessive vibration, or temperature extremes?
- Do local codes or standards dictate specific installation practices?
- Are there maintenance access requirements along the installation route?
Answering these questions upfront leads to a smoother installation and minimizes costly changes later.
Gathering Tools, Materials, and Safety Precautions
Before starting installation, assemble all necessary tools and materials:
- FRP tray sections, couplers, bends, and fittings per design layout
- Support brackets, wall/floor/ceiling fixings, and anchor bolts
- Measuring tape, chalk line, level, and marker
- Drill, cutting saw (with diamond or carbide blade for composites), wrench, and screwdrivers
- PPE: safety gloves, goggles, helmet, and dust mask (when cutting FRP)
Always prioritize safety. FRP dust can irritate skin and lungs, so use appropriate PPE and ensure good ventilation when cutting or sanding. Confirm all electrical sources are safely isolated before working near live systems.
Expert Tip: Tool Selection
Using the right tools not only speeds up installation but also preserves the integrity of FRP trays. For example, a fine-tooth carbide blade reduces chipping and splintering when cutting trays, while laser levels help maintain perfectly straight runs over long distances.
Step 1: Preparing the Installation Area
Preparation ensures a smooth and safe installation:
- Clear the area: Remove obstacles and debris along tray routes.
- Mark the layout: Use a chalk line and markers to indicate tray alignment on walls, floors, or ceilings.
- Check structural supports: Identify wall studs, beams, or other anchor points for tray supports. Reinforce as needed for heavy loads.
- Verify design drawings: Double-check tray dimensions, support placement, and clearances against approved engineering drawings.
It’s beneficial to perform a dry run by laying out components along the path before actual installation. This helps identify any mismatches or site obstacles early on.
Step 2: Installing Support Brackets and Anchors
Support brackets are critical to the performance and safety of your FRP tray system. Follow these steps:
- Bracket spacing: Position brackets at recommended intervals (typically 1.2–1.8 meters, depending on load and tray size).
- Drill anchor holes: Use a suitable drill bit for the wall or structure material.
- Install anchors: Insert anchor bolts or expansion fasteners securely.
- Fix brackets: Attach brackets using corrosion-resistant hardware. Check for level and alignment.
Ensure all supports are firmly fixed and can withstand the specified load, including dynamic forces that may occur during maintenance or emergencies.
Common Mistake: Overlooking Bracket Alignment
If brackets are not perfectly aligned, trays may twist or sag, leading to premature wear or uneven load distribution. Use a spirit level for every bracket installation and re-check after fixing.
Step 3: Cutting and Preparing FRP Tray Sections
Customizing tray lengths and shapes may be necessary for your installation:
- Measure twice: Carefully measure required tray sections to minimize waste.
- Cut with care: Use a diamond or carbide-tipped saw blade. Cut slowly to avoid splintering.
- Smooth edges: File or sand cut edges to remove sharp fibers and ensure safe handling.
- Pre-fit accessories: Assemble bends, tees, or risers as specified in the layout.
Always wear gloves and a dust mask when cutting or sanding FRP trays.
Scenario: Adjusting for On-Site Variations
It’s common to encounter site differences from plan, such as unexpected beams or utility lines. Having extra tray sections and flexible fittings on hand lets you adapt quickly without significant delays.
Step 4: Assembling and Laying FRP Trays
With supports and tray sections ready, begin assembly:
- Position the first tray section: Set onto the brackets, ensuring correct orientation.
- Align and connect: Use manufacturer-supplied couplers or connectors to join tray sections. Tighten fasteners securely but avoid over-torquing, which may damage the composite.
- Install tray covers (if required): Attach covers for added protection in areas where debris, dripping liquids, or falling objects are a concern.
- Add accessories: Mount bends, tees, reducers, and cable retention clips as needed.
- Check alignment: Ensure the entire tray run is straight, level, and properly supported.
For long runs or multi-level installations, work in teams to ensure trays are securely supported during assembly and to prevent accidental falls or drops.
Expert Insight: Expansion Joints
For installations exposed to significant temperature changes, incorporate expansion joints. FRP trays expand and contract less than metals, but long, continuous runs may still require joints to prevent buckling or stress cracking.
Step 5: Securing Cables, Pipes, or Conduits
Once trays are in place, proceed to fill and secure their contents:
- Lay cables or pipes gently: Avoid dropping or dragging heavy items, which can damage the tray or its coating.
- Space contents evenly: Distribute weight across the entire tray for balanced load-bearing.
- Use cable ties or clamps: Secure cables or pipes to prevent movement during operation or maintenance.
- Maintain separation: Keep power, data, and control cables separate as required by electrical standards to prevent interference.
Do not exceed the tray’s recommended fill or load ratings. Overloading can lead to premature wear or failure.
Best Practice: Documentation
Keep a detailed record of all cables and pipes placed within the tray, including labeling at intervals. This simplifies future inspections, troubleshooting, and expansions.
Step 6: Inspection, Testing, and Final Adjustments
Before commissioning your FRP tray system, conduct a thorough inspection:
- Visual check: Inspect all tray joints, supports, and accessories for proper fastening and alignment.
- Physical test: Apply light pressure to ensure trays are firmly anchored and do not flex excessively.
- Compliance review: Verify that installation complies with design drawings and relevant standards.
- Labeling: Clearly label tray sections and content as per project requirements.
Record any deviations or issues and rectify them before full operational use.
Post-Installation Checklist
- All fasteners tightened and checked for corrosion resistance
- All tray runs labeled and documented
- Environmental seals or covers installed where needed
- Final sign-off by qualified supervisor or engineer
Maintenance Tips for Ensuring Long-Term Performance
FRP trays are designed for low maintenance, but periodic checks will maximize their lifespan:
- Routine inspections: Check for signs of physical damage, overloading, or chemical attack.
- Clean debris: Remove dust, dirt, or obstructions from tray surfaces and covers.
- Re-tighten fasteners: Periodically check and tighten bolts or connectors as needed.
- Replace damaged sections: Promptly swap out any tray or accessory showing cracks, heavy wear, or loss of structural integrity.
Well-maintained FRP tray systems can deliver reliable performance for decades, even in the most demanding industrial environments.
Case Study: Maintenance Success in a Petrochemical Plant
One Malaysian petrochemical facility implemented a quarterly inspection regime for its FRP trays. By catching minor damage early—such as a loosened connector after a maintenance event—the team avoided major outages. Over five years, tray performance remained optimal, with only minor repairs needed, demonstrating the value of proactive upkeep.
Practical Examples: FRP Tray Installations in Real Projects
Many Malaysian industries have successfully implemented FRP trays for superior performance. For example, chemical processing plants have replaced rust-prone steel trays with FRP systems, enjoying reduced maintenance and downtime. Water treatment facilities benefit from FRP trays’ resistance to moisture and chemicals, while manufacturing plants appreciate the ease of installation and long-term cost savings. OCM’s expertise in custom FRP solutions ensures the right tray system is specified and installed for each unique application.
Comparison: FRP Trays vs. Traditional Metal Trays
| Feature | FRP Trays | Metal Trays |
|---|---|---|
| Corrosion Resistance | Excellent, even with aggressive chemicals | Poor to moderate; prone to rust |
| Weight | Lightweight | Heavy |
| Electrical Insulation | Yes | No |
| Maintenance Needs | Low | High |
| Installation Speed | Fast (due to weight and ease of handling) | Slower (heavy, more fixings needed) |
| Lifespan | 20+ years | 5–15 years (depending on environment) |
This comparison highlights why more industries are switching to FRP trays for new installations and retrofits.
Common Installation Mistakes and How to Avoid Them
- Skipping Site Survey: Failing to thoroughly assess installation routes can lead to unexpected obstacles, causing delays or costly modifications.
- Improper Support Spacing: Placing supports too far apart can result in tray sagging or even collapse. Always follow the manufacturer’s recommendations.
- Neglecting Expansion Joints: Ignoring thermal movement can cause stress and cracking in long tray runs.
- Overloading Trays: Exceeding the specified weight limit leads to structural failure and safety risks.
- Poor Fastener Selection: Using non-corrosion-resistant hardware defeats the purpose of corrosion-proof trays.
By anticipating and avoiding these mistakes, your this solution installation will serve reliably for years.
Conclusion: Why Professional FRP Tray Installation Matters
A properly installed this option system is a cornerstone of safe, efficient, and durable industrial operations. By following the above step-by-step process—planning, preparing, assembling, and maintaining—you ensure your facility benefits from the full advantages of FRP technology. For complex layouts, large-scale projects, or specialized requirements, partnering with an FRP engineering expert like OCM provides peace of mind, compliance, and superior results.
Ready to upgrade your infrastructure? Choose FRP trays for unmatched durability and long-term value in demanding industrial environments.
Frequently Asked Questions
What are the main advantages of using FRP trays in industrial installations?
FRP trays offer exceptional corrosion resistance, electrical insulation, high strength-to-weight ratio, and low maintenance needs. These qualities make them ideal for harsh environments like chemical plants, wastewater facilities, and manufacturing sites, ensuring long-lasting and reliable support for cables and pipes.
How do I select the correct FRP tray size and load rating?
Begin by calculating the total weight of the cables, pipes, or conduits the tray will support. Consider span length, environmental factors, and applicable industry standards. Consult manufacturer specifications or engineering experts like OCM to ensure the selected tray meets or exceeds load and durability requirements.
What safety precautions should I take when installing FRP trays?
Always wear personal protective equipment, including gloves, goggles, and a dust mask when cutting or handling FRP trays. Ensure good ventilation to avoid inhaling dust, and isolate all electrical sources before installation. Follow site safety protocols to prevent accidents.
Can FRP trays be used outdoors or in chemically aggressive environments?
Yes, FRP trays are specifically designed for use in outdoor, humid, and chemically aggressive environments. Their corrosion-resistant properties make them suitable for areas exposed to chemicals, saltwater, or extreme weather, offering a significant advantage over traditional metal trays.
How often should FRP tray systems be inspected or maintained?
Routine inspections should be conducted at least twice a year. Look for signs of physical damage, overloading, or chemical attack. Clean trays regularly and re-tighten fasteners as needed. Promptly replace any damaged sections to maintain structural integrity and safety.
Upgrade Your Industrial Infrastructure with OCM’s FRP Tray Solutions
Ready for a safer, more durable, and maintenance-free cable management system? OCM offers customized FRP tray manufacturing, engineering, and installation services tailored to your industrial needs. Our ISO 9001:2015 certified solutions ensure long-term reliability and compliance for even the most demanding environments. Partner with OCM to experience superior project support, from initial consultation to post-installation maintenance.
Disclaimer Statement
We hope you found this article informative. Our content is intended for general informational purposes only and does not constitute advice or necessarily reflect the full range of services offered by OCM Enterprise
Readers are advised to consult with a qualified industry professional and contact our experts for crane recommendations specific to their individual project needs. While we strive for accuracy and completeness in our blog posts, we cannot guarantee they are error-free. OCM Enterprise assumes no responsibility for any errors or omissions.